


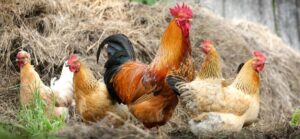
 Chicken Predators – What You Need to Know: Humans aren’t the only animals that enjoy a delicious chicken dinner.
Foxes, coyotes, raccoons, dogs, mink, owls, and some hawks also find chickens a meaty, easy-to-catch meal.
It is frustrating to discover chickens killed by a mink or carried off by a fox. Fortunately, predators can be foiled.
Predators are everywhere. No flock is completely safe from some carnivorous species that would like to eat them.
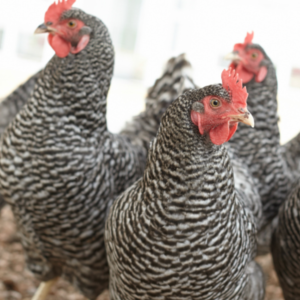
Raccoons and domestic dogs probably kill more chickens than any other animals and live in both rural and urban areas. Raccoons are surprisingly abundant even in New York City!
Seeking revenge is often the first reaction a flock owner has when birds are killed.
Shotguns and traps are sometimes used but killing a chicken-eating fox or raccoon can be both illegal and dangerous. Preventing predation is far more effective than shooting or trapping an animal or two.
Most chicken losses occur at night when raccoons, skunks, opossums, owls, mink, and weasels are most likely to prowl.
The best defense against night shift chicken snatchers is a sturdy tight coop. Chickens come inside at dusk and are almost comatose when sleeping. Once they get inside predators can easily pluck a plump hen off the roost.
The solution is making entry nearly impossible. That’s easier said than done. A mink can ooze through a one-inch diameter hole while weasels can fit through even smaller cracks.
Some ways to keep predators out of the coop include:
- At dusk and when you plan to be away until after dark, close and securely latch all doors, especially the pop hole door.
- Cover all windows with sturdy wire mesh. Raccoons can tear through hexagonal chicken wire, so the stronger wire is essential. One half-inch square hardware cloth thwarts raccoons and even keeps mink out.
- Fill in any holes or cracks in walls or around doors with concrete, caulking, wire, or expanding foam.
- Watch for signs of animals digging tunnels under the coop walls. A concrete coop floor prevents this type of entry, but wire mesh placed on a dirt floor beneath litter and tacked to the coop’s sidewalls also works.
- Eliminate predator hiding places near the coop. Piles of firewood, debris, old vacant sheds, and brush piles offer predators a safe haven as they approach. The fewer places they have to hide the less likely they are to invade.
- Install a sensor-activated light that turns on as a hungry raccoon approaches.
Preventing daytime predators from snatching chickens is more challenging as the birds are often outside.
Dogs are probably the major daytime chicken killers, but several species of hawks may also prey on hens.
Mink, foxes, and weasels are occasionally active during daylight hours but raccoons, opossums, and skunks rarely are. Preparing the run in two ways will reduce predation.
First, confine the flock with a sturdy fence that keeps chickens in and dogs out. Usually, a stout four-foot-tall fence will prevent heavy chicken breeds from flying over it while excluding dogs and foxes. Light breed chickens are adept flyers and a six or eight-foot-tall fence may be needed to confine them.
Second, provide overhead protection. A sure-fire way to keep raptors from snatching an occasional chicken is to cover the run with wire mesh. Small outdoor runs can feature a roof that also keeps rain and snow off the ground.
Chickens, like rabbits and other prey species, recognize that danger can come from the sky. They are safer when the run provides some overhead cover.
A few shrubs planted in the run give chickens places to safely loiter beneath their intertwined branches. A picnic table placed in the run also gives birds a safe haven from the bright sun and overhead predators.
Predators are crafty and often catch chickens and their owners by surprise. Months can go by with no loss. Then in just a sort time, many birds can be killed. Preventing predators from accessing chickens is the best way to keep them safe.
In conclusion, Kissimmee Valley Feed cares about the safety and health of your chickens! See our poultry selection here.
Read more articles similar to this one and the original article at Nutrena, Scoop from the Coop.
 Switch laying hens to a complete chicken layer feed when they start laying eggs around 18 weeks of age. Choose a complete layer feed that includes all the essential nutrients laying hens need to lay strong and stay strong. Then make the transition gradually over one week.
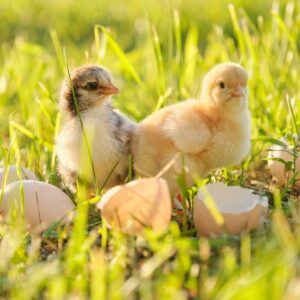 Everything you Need to Know about Raising Baby Chicks: Bringing home your baby chicks is an exciting milestone in raising backyard chickens. The three key essentials for raising baby chicks: Warmth, water and feed. Start chicks strong by providing a complete chick starter feed from day 1 through week 18.raising baby chicks
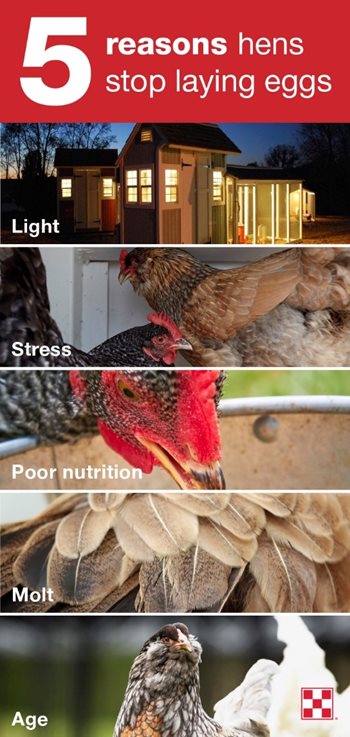 There’s a lot of misinformation circulating about why chickens stop laying eggs. We’re here to clear that up with some facts. Chickens stop laying eggs for a variety of reasons. Hens may lay fewer eggs due to light, stress, poor nutrition, molt or age. Some of these reasons are natural responses, while others can be fixed with simple changes and egg-laying can return to normal.
 What Do Baby Chicks Eat? Baby chicks grow quickly, doubling their hatch weight in the first week and growing up to seven times their hatch weight in the first month. To support this early growth, baby chicks should eat a complete starter-grower feed which contains the 38 unique nutrients they need to start strong and stay strong. A starter-grower feed with the Chick Strong® System helps raise strong chicks that grow into happy, healthy hens.